

Step-by-Step Guide to Roofing Installation: What to Expect
A properly installed roof not only enhances your home’s structural integrity but also adds long-term value. However, the roofing installation process can feel overwhelming if you’re unfamiliar with what it involves. Knowing what to expect from a professional Roof Installation service will make the project smoother and far less stressful.
A properly installed roof not only enhances your home’s structural integrity but also adds long-term value. However, the roofing installation process can feel overwhelming if you’re unfamiliar with what it involves. Whether you’re tackling a full replacement or need timely roofing repair, working with trusted experts like Aztec Force Roofing LLC ensures the job is done right. Knowing what to expect from the process can make the entire experience smoother and far less stressful.
Initial Roof Inspection and Preparation
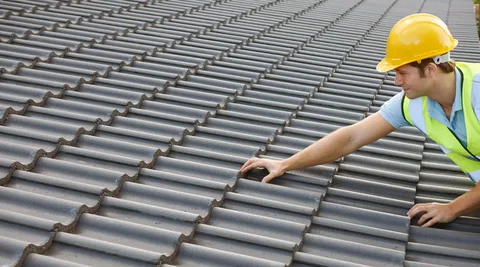
The first and crucial step in any roofing installation is a thorough roof inspection. Whether replacing an existing roof or installing one on new construction, inspecting the current roof system helps identify any hidden damage or structural issues.
What happens during inspection?
-
The roofing contractor checks for damaged or rotted decking underneath shingles.
-
They inspect for loose, missing, or cracked shingles that may affect the installation.
-
Ventilation systems and flashing around chimneys, vents, and skylights are examined.
-
Moisture damage or mold presence under the roof deck is evaluated.
Preparation phase:
-
Roof tear-off: Removing old shingles and nails to expose the roof decking. Some roofs have one layer of shingles, others multiple; all layers may need removal based on local codes and roof condition.
-
Repair or replace any damaged decking to provide a solid, smooth base.
-
Clean the roof surface of debris to allow proper adhesion of underlayment and roofing materials.
This preparation sets the foundation for a successful installation.
Installing Underlayment and Waterproof Barriers
After the roof deck is clean and repaired, the next step is installing an underlayment. This essential protective layer sits directly on top of the decking and acts as a moisture barrier.
Why underlayment matters:
-
It offers secondary protection from water infiltration if outer roofing materials are damaged.
-
Helps reduce condensation buildup under the roofing materials.
-
Increases overall roof durability and lifespan.
Common types of underlayment:
-
Asphalt-saturated felt, which is traditional and cost-effective.
-
Synthetic underlayment, a newer option offering enhanced durability and water resistance.
Additionally,ice and water shield membranes are installed along roof edges, valleys, and other vulnerable spots. These sticky, waterproof sheets prevent ice dams and heavy rain from seeping under shingles.
Flashing Installation: Sealing Vulnerable Areas
Flashing is a critical part of roofing installation that often goes unnoticed but plays a huge role in preventing leaks.
What is flashing?
-
Thin metal strips (usually aluminum or galvanized steel) installed around roof penetrations and joints.
Where flashing is installed:
-
Around chimneys, skylights, and vent pipes.
-
At roof valleys where two roof planes meet.
-
Along eaves and rakes (roof edges).
Flashing directs water away from these openings, stopping leaks before they start. Proper installation requires experience to avoid gaps or improper sealing.
Installing the Roofing Material
With the underlayment and flashing in place, the main roofing material is ready to be installed.
Popular roofing materials include:
Asphalt shingles: Affordable, easy to install, and widely used.
-
Metal roofing: Durable, lightweight, and energy-efficient.
-
Wood shakes or shingles: Provide a rustic look but require maintenance.
-
Clay or concrete tiles: Long-lasting and great for hot climates.
-
Slate: Very durable and elegant but expensive and heavy.
Installation process:
-
Materials are installed starting at the eaves, working upwards in overlapping layers to ensure water runoff.
-
Nails or screws fasten the materials securely to the roof deck.
-
Contractors follow manufacturer instructions and local building codes for spacing, fastening, and alignment.
Proper installation here impacts your roof’s weather resistance, wind uplift protection, and overall lifespan.
Ridge Cap and Vent Installation
Once the roofing material is fully installed, the ridge cap is applied along the roof’s peak.
Purpose of ridge caps:
-
Cover the seam where two roof planes meet, protecting from water intrusion.
-
Often designed to work with ridge vents that allow hot, moist air to escape from the attic.
Why ventilation is important:
-
Prevents heat buildup that can damage roofing materials.
-
Reduces moisture that causes mold, mildew, and wood rot.
-
Enhances energy efficiency by keeping the attic cooler in summer.
Proper ventilation extends your roof’s life and improves home comfort.
Final Cleanup and Inspection
After installation, the roofing crew cleans the site thoroughly.
Cleanup includes:
-
Removing leftover nails, shingles, and debris from your property.
-
Using magnetic tools to pick up stray nails and metal pieces for safety.
-
Ensuring gutters and downspouts are clear of debris.
Quality inspection covers:
-
Checking nail placement and fastening.
-
Verifying flashing and seals around penetrations.
-
Examining overall roof alignment and aesthetics.
-
Ensuring installation complies with manufacturer and code requirements.
A thorough inspection confirms your roof is ready to protect your home effectively.
Why Professional Roofing Installation is Crucial
While some homeowners may consider DIY roofing, professional installation offers numerous advantages:
-
Skilled contractors have the knowledge and equipment for precise installation.
-
Warranty compliance often requires professional workmanship.
-
Professionals ensure safety for themselves and your property.
-
They can spot and address potential issues early.
-
Proper installation improves your home’s value and reduces future repair costs.
Investing in experts guarantees a high-quality roof that stands the test of time.
Conclusion
Understanding the roofing installation process step by step empowers you to make informed decisions and ensures a smoother experience from start to finish. From the initial inspection to the final cleanup, each phase plays a crucial role in the longevity and performance of your roof. Whether you're installing a brand-new system or addressing issues through roofing repair, working with experienced professionals is key. A properly installed roof not only safeguards your home but also adds lasting value—making it a smart and essential investment for any homeowner.
Frequently Asked Questions (FAQs)
1. How long does a roofing installation typically take?
Most residential roofing projects take 1 to 3 days depending on the roof size, material, and weather conditions.
2. Is it better to remove the old roof before installation?
Yes, removing old roofing allows inspection and repair of the decking and ensures proper installation of the new roof.
3. What is the most durable roofing material?
Slate, metal, and clay tiles are among the most durable, often lasting 50 years or more with proper maintenance.
4. How much does roofing installation cost?
Costs vary widely based on materials, labor, roof complexity, and location. A typical range is $5,000 to $15,000 for an average-sized home.
5. How often should I maintain my new roof?
Routine inspections every 2-3 years, debris removal, gutter cleaning, and prompt repair of any damage help prolong your roof’s life.
